


News: A new version of Mosca will shortly be released, implementing work by Thibaud Keller. The release will bring support for new ambisonic libraries as well as VBAP, OSC support and integration with OSSIA-score, improved GUI, support for higher order ambisonic signals, banks of RIRs selectable on a per-source basis and many other improvements. For details on the upcoming release, see the conference paper by Iain Mott and Thibaud Keller: Three-dimensional sound design with Mosca.
----------------------------
Mosca is a SuperCollider class for GUI-assisted production of ambisonic sound fields with simulated moving or stationary sound sources. The class makes extensive use of the Ambisonic Toolkit ( ATK, see: http://www.ambisonictoolkit.net/ ) by Joseph Anderson and the Automation quark ( https://github.com/neeels/Automation/ ) by Neels Hofmeyr.
Input sources may be any combination of mono, stereo or B-format material and the signals may originate from file, from hardware inputs (physical or from other applications such a DAW via Jack) or from SuperCollider's own synths. In the case of synth input, synths are associated by the user with a particular source in the GUI and registered in a synth registry. In this way, they are spatialised by the GUI and also receive data from the GUI pertaining to the source (eg. x, y and z coordinates or auxiliary fader data). Sound fields may be decoded using a variety of built in 1st order ambisonic SuperCollider decoders (including binaural) or with external 2nd order decoders such as Ambdec in Linux. Mosca has its own transport provided by the Automation quark for recording and playback of source data. This may be used independently or may be synchronised to a DAW using Midi Machine Control (MMC) messages. This function has been tested to work with Ardour and Jack.
Mono and stereo sources are encoded as second order ambisonic signals whereas B-format signals remain as 1st order and are angled in space using "push" transformations. Source signals are attenuated proportionally to the inverse of the square root of proximity or in a linear relationship with distance, selectable on a per-source basis via the GUI. All sources are subject to high-frequency attenuation with distance and if decoding is performed by one of the ATK's 1st order decoders, a proximity effect is generated adding a bass boost to proximal sources among other phase effects to simulate wave curvature (see: http://doc.sccode.org/Classes/FoaProximity.html).
Reverberation is performed either using a B-format tail room impulse response (RIR) - the preferred method - or using the built in FreeVerb reverberator, options selectable on creation of a Mosca instance. With both options, two reverberation level controls are included in the GUI to set close and distant levels. A further two reverb types are selectable in the GUI on a per-source basis for both RIR and allpass reverberation modes. The default reverb type uses John Chowning's technique of applying "local" and "global" reverberation to sources (CHOWNING). The "Close" reverberation of the GUI in this case is "global" and is audible by the listener from all directions when the source is close whereas "distant" reverb is "local" in scope and is encoded as a 2nd order ambisonic signal along with the dry signal. This predominates as the source becomes more distant. The second type of reverberation may be described as a "2nd order diffuse A-format reverberation". This technique produces reverberation weighted in the direction of sound events encoded in the dry ambisonic signal and involves conversion to and from A-format in order to apply the effect (ANDERSON). The encoded 2nd order ambisonic signal is converted to a 12-channel A-format signal and then either a) convolved with a B-format RIR which has been "upsampled" to 2nd order and converted to A-format impulse spectrum, or, as in the case of the allpass option, b) passed through a 12-channel bank of allpass filters before being converted back to a 2nd order B-format diffuse signal. Please note that the 2nd order diffuse reverberation may require the user to set a larger audio output buffer and thus increase the latency of the system. The "Chowning" type reverberation is more efficient and the "allpass" option, more still.
Mosca also has other features including a scalable Doppler Effect on moving sources, looping of sources loaded from file, adjustment of virtual loudspeaker angle of stereo sources and in the case of B-format sources: a rotation control, adjustment of "directivity" (see ATK documentation) and a control of "contraction", whereby the B-format signal may be crossfaded with its W component and which is spatialised as a 2nd order ambisonic signal.
Mosca supports methods for making "A-format inserts" on any source spatialised in the GUI. In this way, the user may write a filtering synth and apply it to the sound without disrupting the encoded spatial characteristics. Please see the code examples below for more information.
Additionally, Mosca v0.2 implements headtracking with the Arduino 9-axes Motion Shield and an appropriate Arduino board such as an Uno. Mosca may also run GUI-free and has a mechanism for coded control of the interface. See below for more information.
If you use these resources or have suggestions, please get in contact!
DOWNLOAD
To use Mosca, note that SuperCollider must be installed with its full assortment of plugins as well as the Ambisonic Toolkit (ATK) for SuperCollider, see: http://www.ambisonictoolkit.net/download/supercollider. The Mosca class has been prepared as a SuperCollider quark and is available here: https://github.com/escuta/mosca
You may clone the Mosca quark using "git clone https://github.com/escuta/mosca" or download the project as a Zip file from the github page and then place it in you quarks directory to install. Alternatively, if using Supercollider 3.7 or higher, simply run the following command in SuperCollider to install: Quarks.install("https://github.com/escuta/mosca");
See the Mosca quark help file for instructions. You may also choose to download the following zipped example (large) project directory: moscaproject.zip or use the smaller moscaproject.zip file contained within the git source which contains the basic file structure for a Mosca project as well as an example RIR file. The larger archive contains the file structure and RIRs as well as B-format material, including a B-format Spitfire recording by John Leonard This is provided with John's kind permission. Other B-format material recorded by Iain Mott in Chapada dos Veadeiros and Brasilia is also included. A README file in the archive and attached separately below, includes complete instructions on installing Mosca from scratch on Linux. Importantly, the README also details how to use the Mosca GUI.
USING MOSCA
A video tutorial of Mosca is available here: http://escuta.org/moscavideo
Please ensure that SuperCollider is installed with plugins from: https://github.com/supercollider/sc3-plugins
It is also necessary to install the ATK Kernels: http://www.ambisonictoolkit.net/download/kernels
The user must set up a project directory with subdirectories "rir" and "auto". RIRs should have the first 100 or 120ms silenced to act as "tail" reverberator and must be placed in the "rir" directory. For convenience, please download the "moscaproject.zip" file on the following page which contains the file structure, example RIRs and B-format recordings as well as other information and demos. Note that the example RIR is recorded at 48kHz:
http://escuta.org/mosca
Please then see the methods and code examples below.
Once you have successfully opened the GUI, read this:
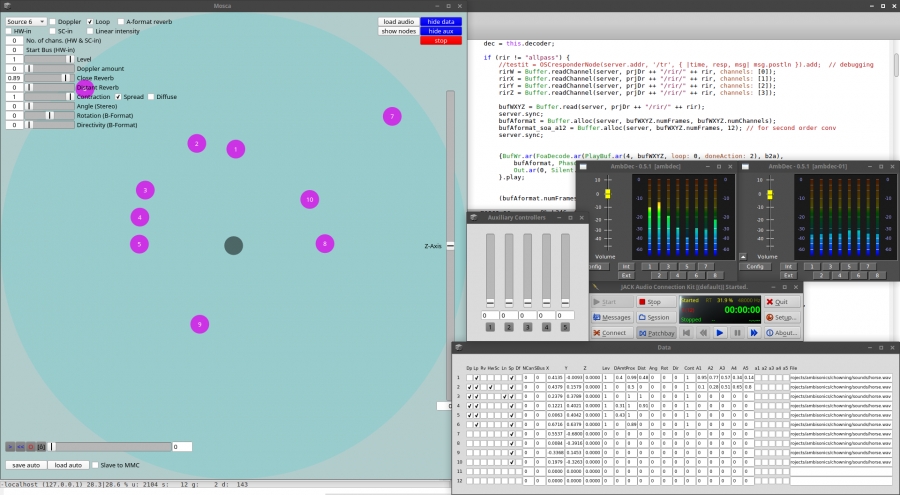
NOTES ON GUI COMPONENTS
- Source pull down menu. Select a source
- Doppler. The user must also use the "Doppler Amount" slider to adjust the effect
- Loop. Loop sounds loaded from file
- A-format reverb. By default the system uses the more efficient Chowning-style reverb described above. This toggle applies a second order diffuse 2nd order reverberation to mono and stereo sources as well as "contracted" B-format material (see below). Note that the reverberation applied to B-format signals is always via A-format transformation.
- HW-in. Toggle this to read audio from hardware inputs. The user must specify the number of channels and the staring bus (starting with zero) in the two fields beneath the toggle. Note this will override any loaded sound file. It is up to the user to manage the start busses for the various source. If for example source 1 is a 4 channel signal and starts on bus zero, a second stereo source myst use a starting bus of 4 or higher.
- SC-in. Get audio in from a SuperCollider synth. The user needs to specify the number of channels in the GUI but does not need to specify the starting bus. See code examples below for more information. Like HW-in, selecting SC-in for a particular source will disable any sound file that has been loaded.
- Linear Intensity. Select this to apply linear attenuation of itensity with distance. By default, intensity is adjusted in proportion to the invesrse square root of proximity.
- load audio. Load a sound file for a given a source.
- show data. Open and close a data window for all sources showing all parameters.
- show nodes. Show SuperCollider node tree.
- show aux. Open and close an auxiliary controller window for a source. These sliders do not affect spatialisation of the source, however the data produced is sent to any "registered" SuperCollider synth is recorded and reproduced by the GUI's transport. See the code examples for more information.
- audition. Use this button to audition a given source. Note that the transport also plays and cues sounds, "audition" should only be used to test sounds with the interface.
- record audio. Records audio as a wav file to the project directory defined by the "projDir" class method. The number of channels recorded and the starting bus are defined by the "recchans" and "recbus" class methods respectively (see below).
- blips. Check this box to include audible blips at the begining of the recording. This may be useful when post synchronising the recorded audio with footage taken on a video camera.
- Level. Adjust playback level of source.
- Doppler amount. See b) above.
- Close Reverb. Adjust level of reverberation for proximal sources.
- Distant Reverb. Adjust level of reverberation for distant sources.
- Angle. Adjust angle of virtual speaker pair for stereo sources. The default is 1.05 radians or 60 degrees.
- Rotate. Rotate a B-format signal on the horizontal plane.
- Directivity. Adjust the directivity of B-format signal (see ATK documentation)
- Contraction. In the case of B-format input, contraction is a cross-fade between B-format signal an its W component. Note that the "contracted" signal is spatialised with 2nd order ambisonics when using an external decoder. When the user is decoding with a 1st order decoder from the ATK, mono and stereo signals are encoded as omnidirectional B-format signals and angled in space using the ATK's "push" transformation. In this this case contraction varies between an omnidirectional signal and a spatially focussed signal.
- Spread / Diffuse. As mentioned above, when using a 1st order decoder, mono and stereo signals are signals are encoded as omni B-format signals before being "pushed" into an angular location (if fully "contracted"). The Spread and Diffuse toggles allow the user to select two other methods to diffuse the signal omni-directionally. See "spread diffusion encoder" and "frequency spreading encoder" here: http://doc.sccode.org/Classes/FoaEncode.html
- Z-axis. Manipulate the Z-axis of current source.
- Automation transport. Includes a "play/stop" button, a return to start button, a record button and a "snapshot" button of current values button. The Automation transport also contains a slider to move the "play head". Loaded sounds which are not looped will start at the beginning of the file at "0" on the transport and the transport fader may be used to advance through these sounds as well as advance through the recorded fader settings.
- save auto / load auto. Save/load to/from a chosen directory.
- Slave to MMC. Slave the transport to incoming Midi Machine Control data. This has been tested with Ardour and Jack on Linux.
- Loop. Loop the transport.
- Orientation (when used with Arduino 9-axes Motion Shield headtracking device (see below). The values are for heading, roll and pitch and are in degrees radians.
CODED CONTROL OF MOSCA
The GUI does not control internal variables directly, but rather via proxies of the class AutomationGuiProxy. This enables Mosca to run with or without a GUI as it is the proxies that save and read Automation data to and from disk and not the GUI elements themselves. Ordinarily the user does not need to know about this technical detail, however the proxies serve another useful purpose, they can be used for coded control of Mosca, with or without an active GUI. Proxies objects behave like GUI elements in that they have a value and an assigned function that when called upon, acts on that variable. So for example, if we wish to get the current x-position for a particular source we may use: myMoscaInstanceName.xboxProxy[i].value, where i is the number of the source with the index starting at zero. We may use the method valueAction to set the value of a proxy and have its value propagated through the system. So for example, if we wish to change the position of the x-coordenate for source 2 to 0.5, we use: myMoscaInstanceName.xboxProxy[1].valueAction = 0.5. The following is a list of available proxies:
xboxProxy - x-coord (-1 - 1)
yboxProxy - y-coord (-1 - 1)
zboxProxy - z-coord (-1 - 1)
dcheckProxy - Doppler checkbox (flag))
lpcheckProxy - loop checkbox (flag)
rvcheckProxy - A-format reverb checkbox (flag)
hwncheckProxy - Hardware-in checkbox (flag)
scncheckProxy - SuperCollider-in checkbox (flag)
lncheckProxy - linear intensity (flag)
ncanboxProxy - number of channels (1,2 or 4)
businiboxProxy - start bus (0 - n)
vboxProxy - level (0 - 1)
dpboxProxy - Doppler amount (0 - 1)
gboxProxy - close reverb (0 -1)
lboxProxy - distant reverb (0 -1)
cboxProxy - contraction (0 -1)
spcheckProxy - spread checkbox (flag)
dfcheckProxy - diffuse checkbox (flag)
aboxProxy - angle (0 - 3.14rad)
rboxProxy - rotation (-3.14 - 3.14rad)
dboxProxy - Directivity angle (0 - 1.57rad)
a1checkProxy - auxiliary 1 button (flag)
a2checkProxy - auxiliary 2 button (flag)
a3checkProxy - auxiliary 3 button (flag)
a4checkProxy - auxiliary 4 button (flag)
a5checkProxy - auxiliary 5 button (flag)
a1boxProxy - auxiliary 1 level (0-1)
a2boxProxy - auxiliary 2 level (0-1)
a3boxProxy - auxiliary 3 level (0-1)
a4boxProxy - auxiliary 4 level (0-1)
a5boxProxy - auxiliary 5 level (0-1)
stcheckProxy - stream check (data window) (flag)
tfieldProxy - file path (data window) (path)
SERIAL DEVICES / HEAD TRACKING
The Arduino and 9-Axes Motion Shield and supporting Arduino board such as the Uno (tested) should be placed on top of the headphones with the USB socket of the Arduino directed to the left of the user. In this orientation the USB cable can run down left-hand side of headphones together with audio lead. Use the Arduino project files in the directory "arduinoHeadTrack" in the git sources to configure the Arduino and shield. See https://www.arduino.cc for more information on the Arduino.
When using Mosca with a head-tracker, it is useful to access the serial device with a persistant name. To do this on Debian/Ubuntu Linux, first get information about an attached device with a line such as:
udevadm info -a -p $(udevadm info -q path -n /dev/ttyACM0)
Search for the block of data that contains reference to the Arduino and take note of the values for idVendor and idProduct. Then create a file /etc/udev/rules.d/10-local.rules and add contents such as the following (edit this line and above to your needs):
ACTION=="add", ATTRS{idVendor}=="2341", ATTRS{idProduct}=="0043", MODE:="0666", SYMLINK+="head_tracker"
To load this without rebooting, type: sudo udevadm control --reload-rules
Then disconnect and reconnect your device. In the above example it can be accessed at /dev/head_tracker for example.
ACKNOWLEDGEMENTS
Many thanks to Joseph Anderson, Neels Hofmeyr and members of the SuperCollider list for their assistance and valuable suggestions.
REFERENCES
ANDERSON, Joseph. Authoring complex Ambisonic soundfields: An artist's tips & tricks. . In: DIGITAL HYBRIDITY AND SOUNDS IN SPACE JOINT SYMPOSIUM. University of Derby, UK: 2011.
CHOWNING, John M. The Simulation of Moving Sound Sources. Computer Music Journal, v. 1, n. 3, p. 48-52, 1977.